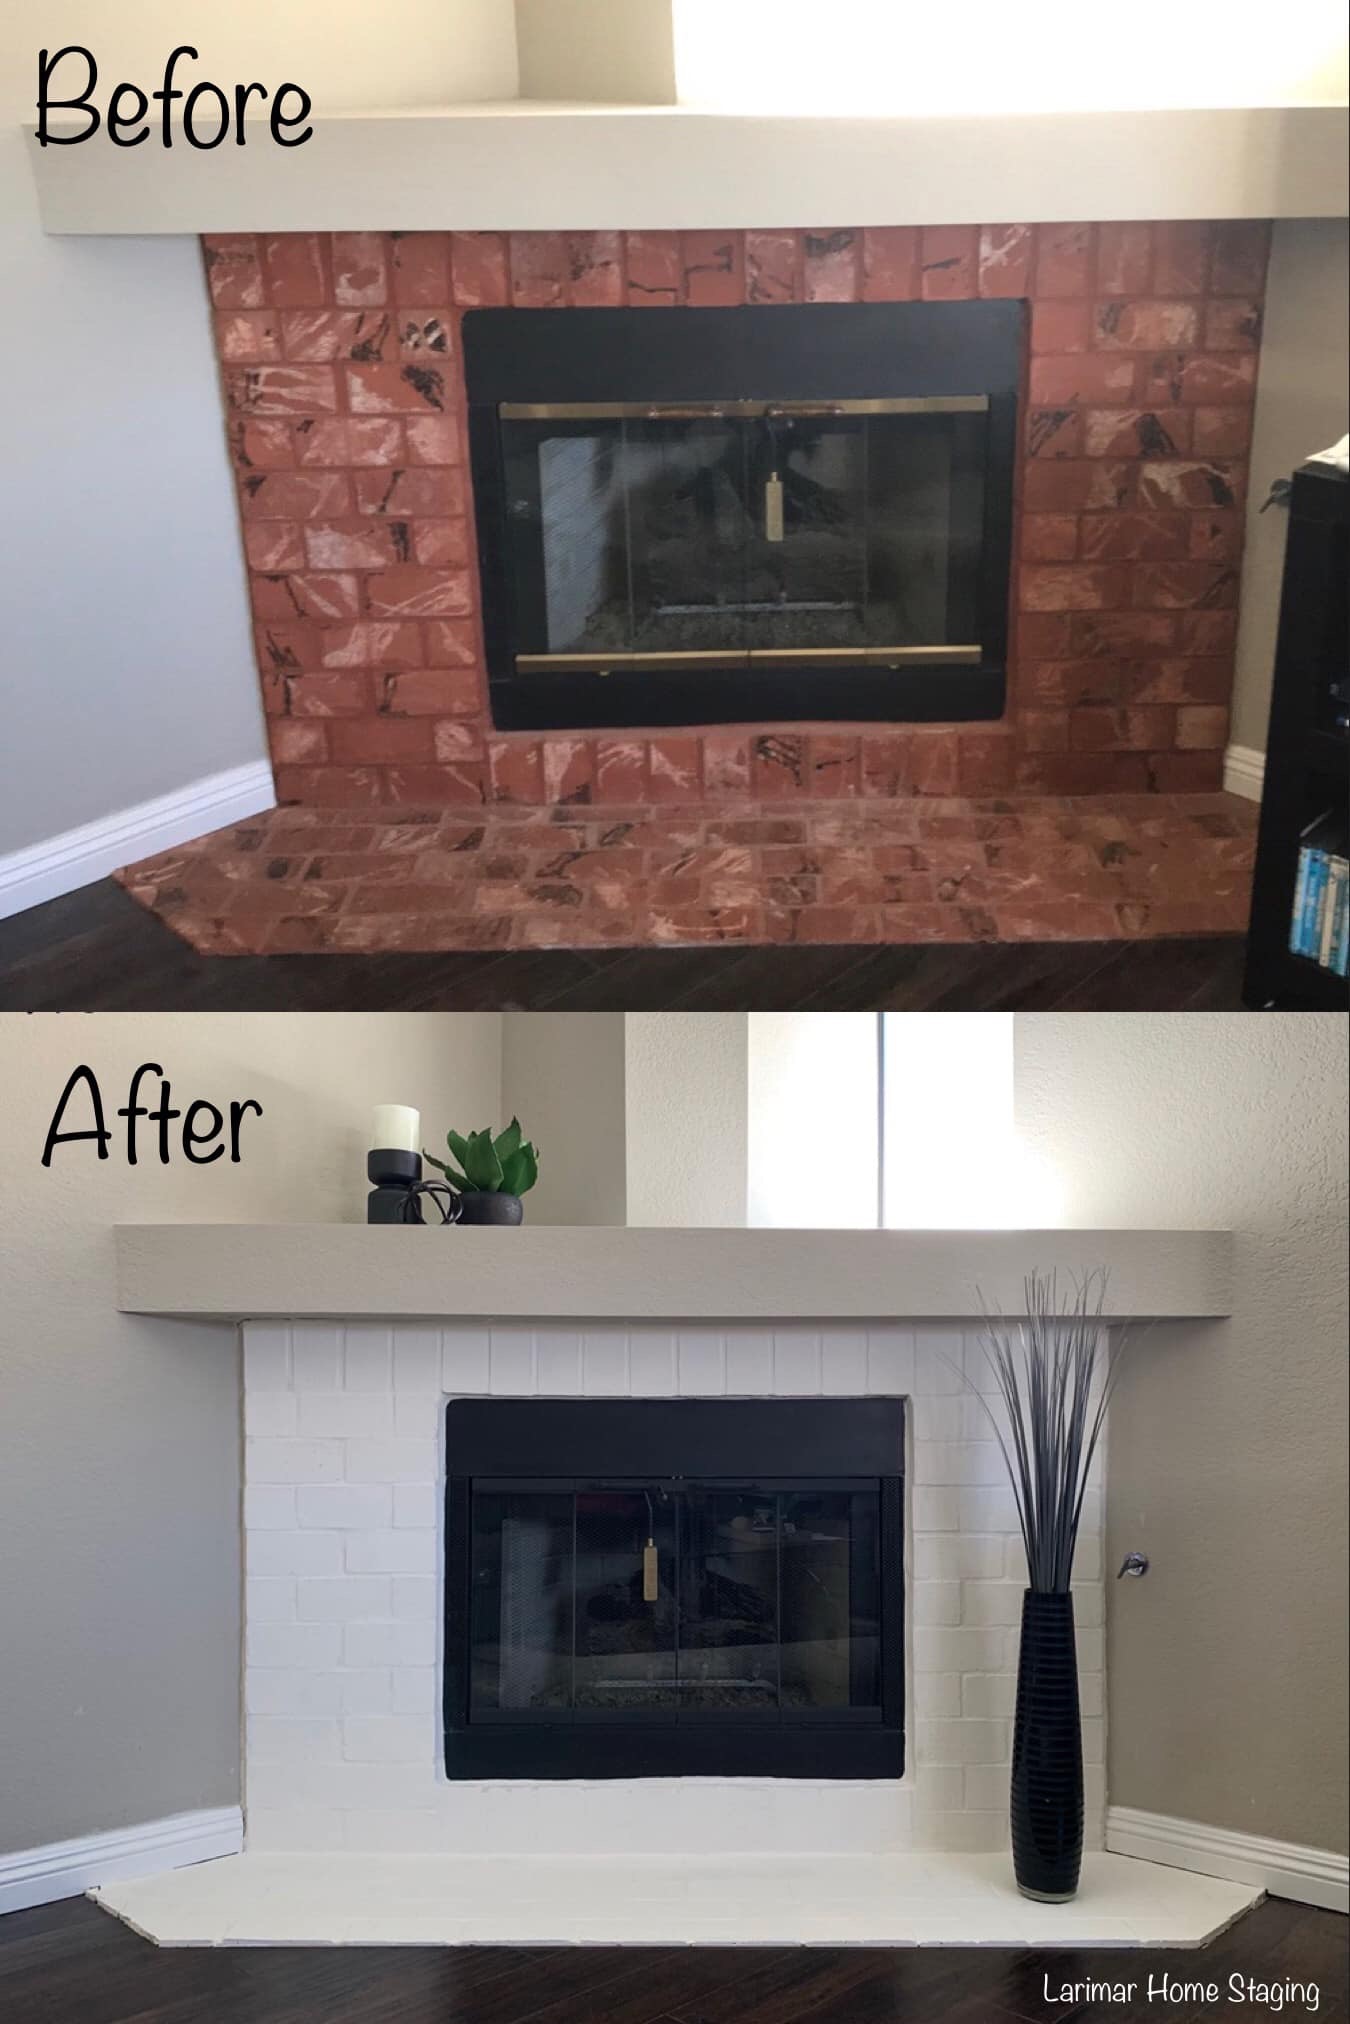
The image above is a white limewash fireplace before and after I did for a client just before he listed his home for sale. As a home stager, I usually don't do any of the painting that I recommend be done to prepare a home for sale, but I will do small projects like this (for an additional fee, of course).
I used Romabio Classico Limewash in Avorio white. This particular brick was a veneer rather than whole blocks, and perhaps even faux rather than real brick, but it still had the porous texture of real brick, so the limewash worked beautifully.
Romabio limewash comes in a concentrated powder form that you mix with water. Use more water for a distressed, whitewashed look that allows some of the brick to show through, or use less water to create a thicker wash that will give you a more solid, opaque look.
My client's home was more contemporary than traditional, so we opted for an opaque look. To achieve this, I not only used less water for a thicker wash, I also applied three coats.
If you'd like a more "old world" distressed look, only apply one coat and use a spray bottle and a cloth to simply wipe away the limewash in random spots. If you're using it for an exterior application, use a water hose with an attached spray nozzle to get a distressed or whitewashed appearance.
The fact that the limewash can be wiped away or sprayed off so easily also makes this method of updating brick far less messy and forgiving than paint. You can even wash it all off within 48 hours if you decide you don't like it, although that may be more challenging with an interior application.
Here's how I did this easy fireplace makeover on a budget using limewash and spray paint:
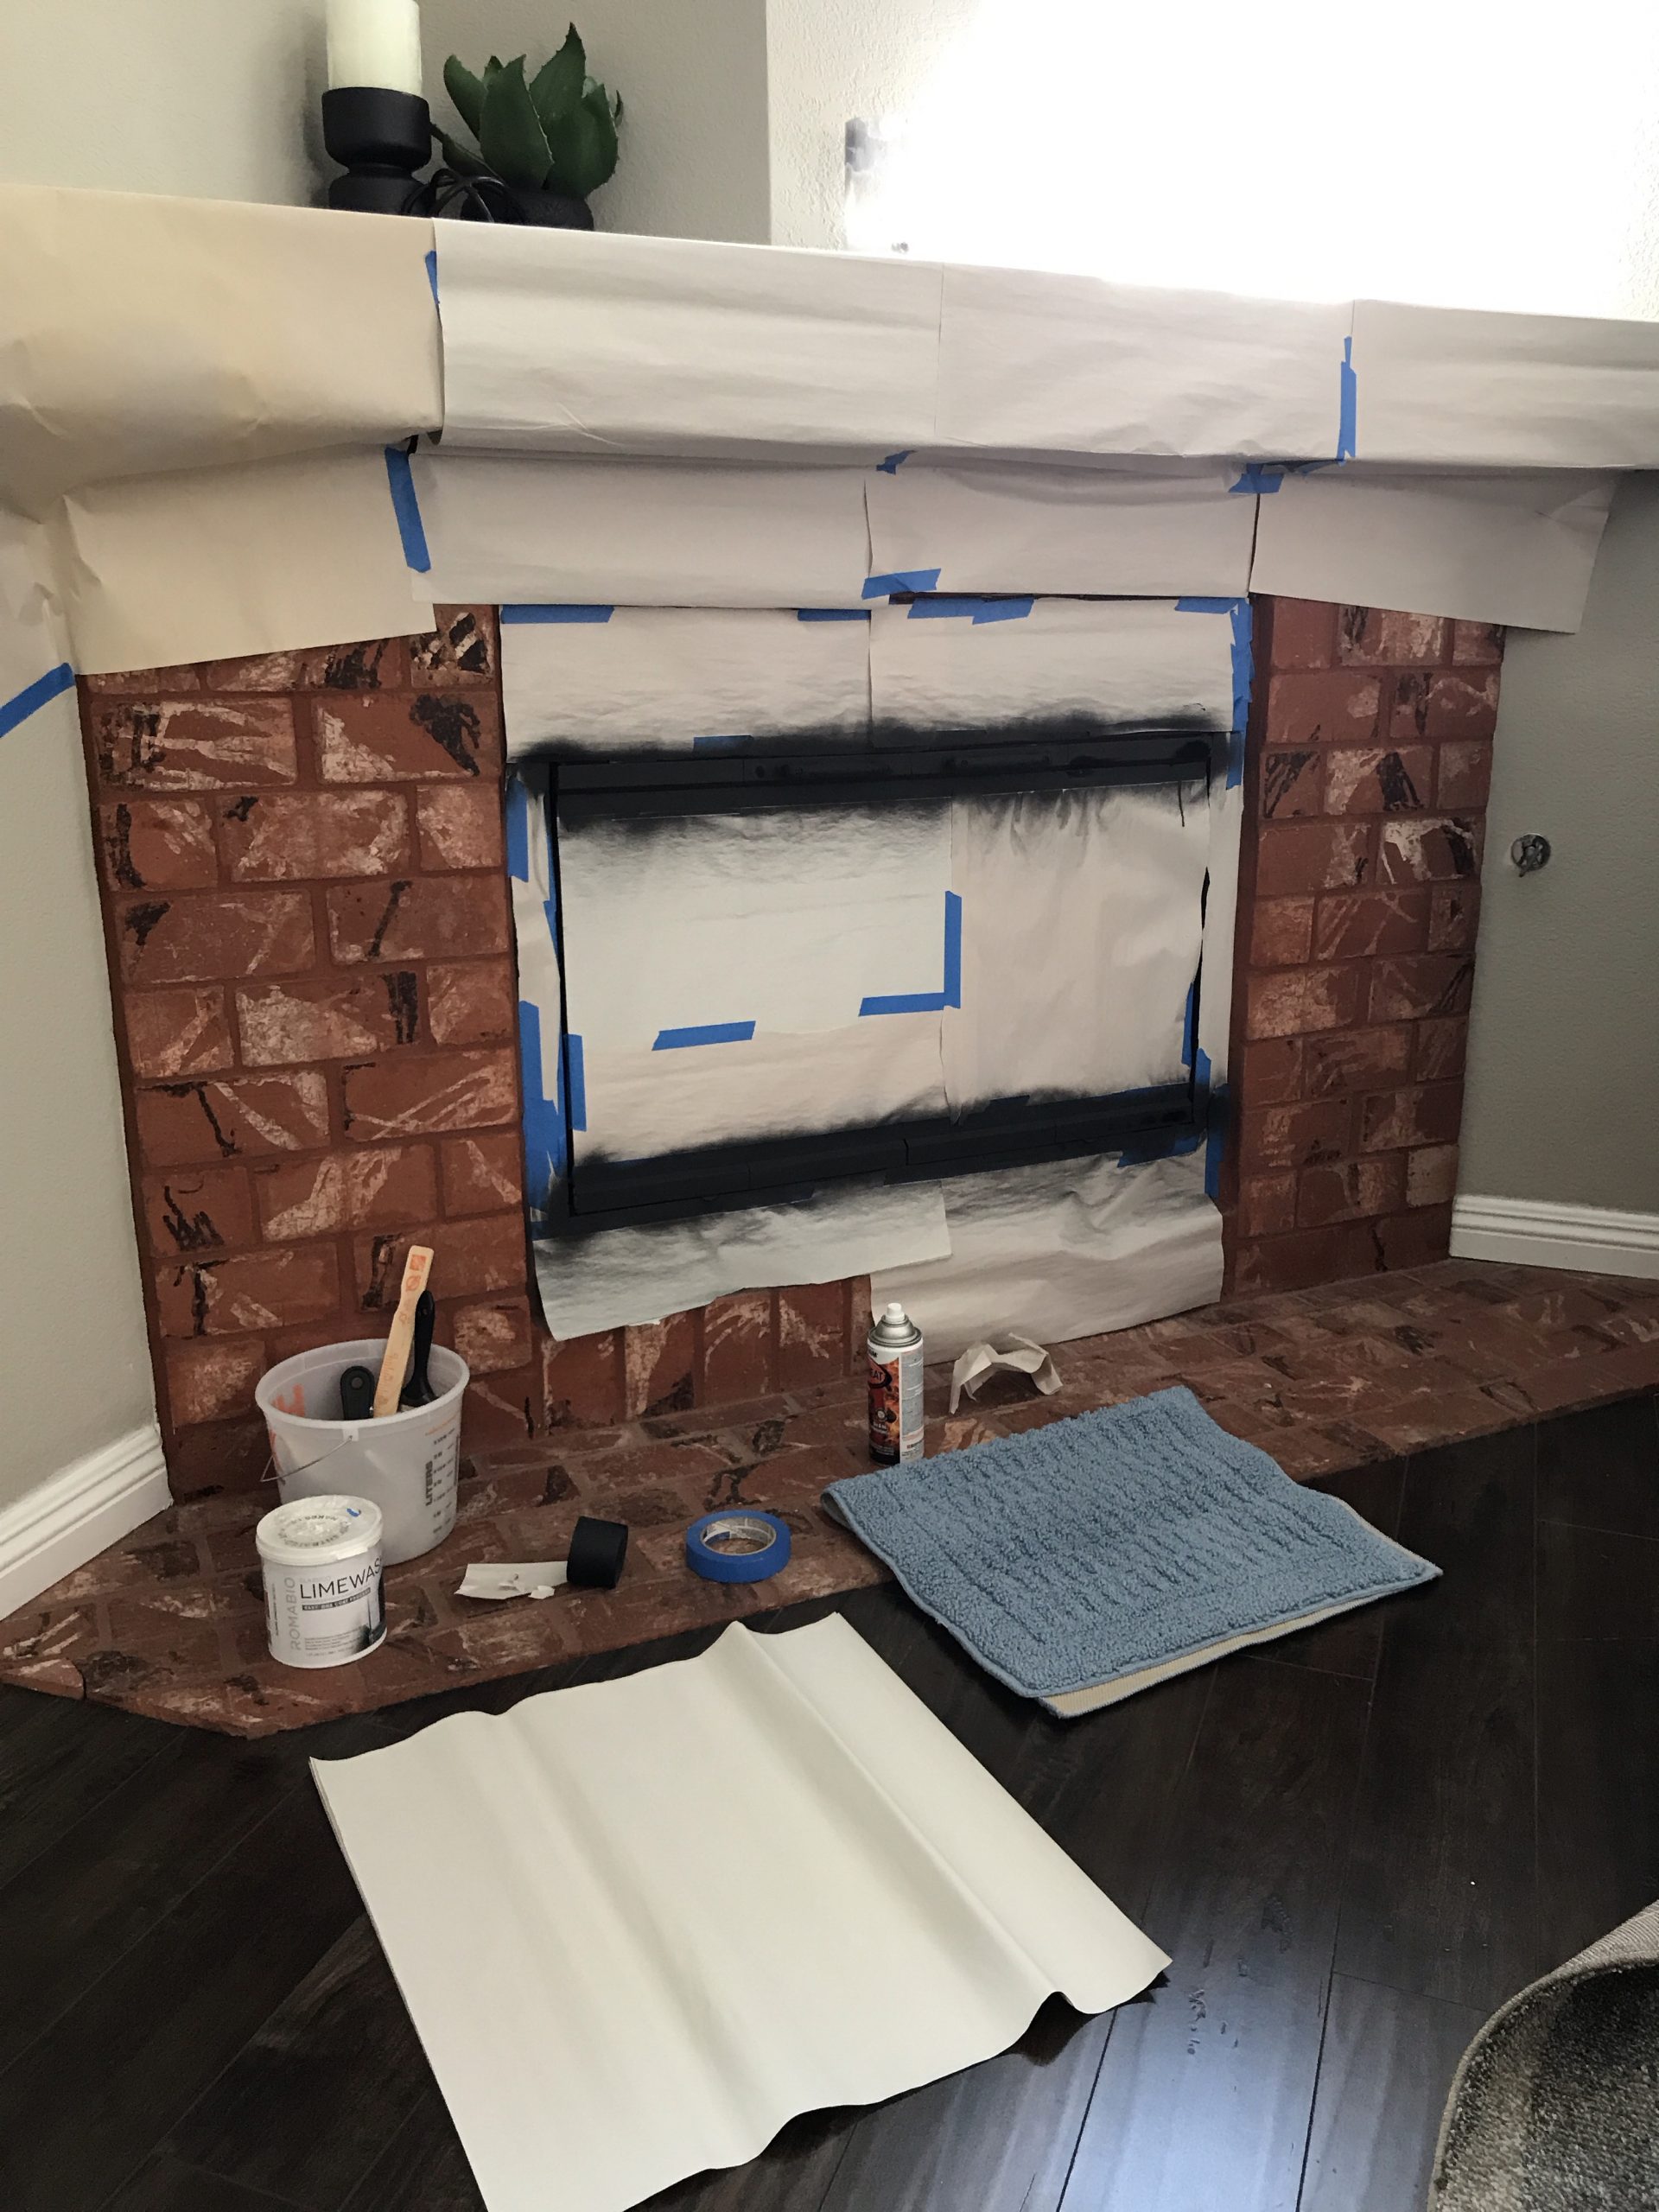
This step isn't necessary if you are going to use the limewash alone. However, I also wanted to paint the brass on the fireplace doors, so I used paper and tape to protect the surrounding areas, leaving the brass parts exposed.
I used two light coats of black Rustoleum High Heat spray paint on the brass accents on the fireplace doors, allowing each coat to dry completely in between coats. (The blue rug was just to serve as cushion for my knees).

While the paint on the brass dried, I mixed the limewash. Using the empty white bucket and the paint stirrer in the photo above, I dumped the entire container of Romabio limewash in the bucket and mixed half the amount of water normally used so the finish would be more opaque.
After stirring the limewash thoroughly, I applied it to the brick using a masonry brush. Any course brush will do. I used a small chip brush for the smaller detail work. I applied a total of three coats to get a solid, opaque finish, which is what the client and I both agreed would fit best with the style of his home. I kept a wet cloth on hand to clean up any limewash that got on the floor. It wipes up very easily.
And that's it! It really is that easy! No seal or topcoat is needed. This was the first time I used limewash to update a fireplace, so there was a slight learning curve that slowed me just a teeny bit. Even so, the time it took me to tape off and spray paint the doors and apply the limewash only took a couple of hours. Next time I do this, it should take much less time now that I'm comfortable with the process.
Not only was this red brick fireplace makeover very easy, it was inexpensive, so it's a great way to update a brick fireplace on a budget. I spent less than $50 on tools and materials for this DIY fireplace makeover.
Romabio's limewash comes in three shades of white, one shade of gray, and two shades of beige. If you'd like a custom color for your fireplace or interior or exterior brick wall, Romabio also offers a line of masonry paint that you can have mixed in any color at Home Depot's paint counter.
Here are my fireplace makeover before and after pics again. The end result looks updated and much better, especially considering this brick didn't go at all with the contemporary architecture of the client's home. If I could do this over again, the only thing I'd do differently is use Romabio's cooler white so it would blend better with the trim. The three whites they offer are cool, neutral, and warm. Avorio is supposed to be their "neutral" white, so I assumed it would be the safest choice.
For those of you curious to know what color is on the walls, that's Sherwin Williams Amazing Gray.
If you're selling your house soon, or would just like to update it so you get more enjoyment out of it, I offer both
in-person and online consultations.
Call to book your consultation today!


